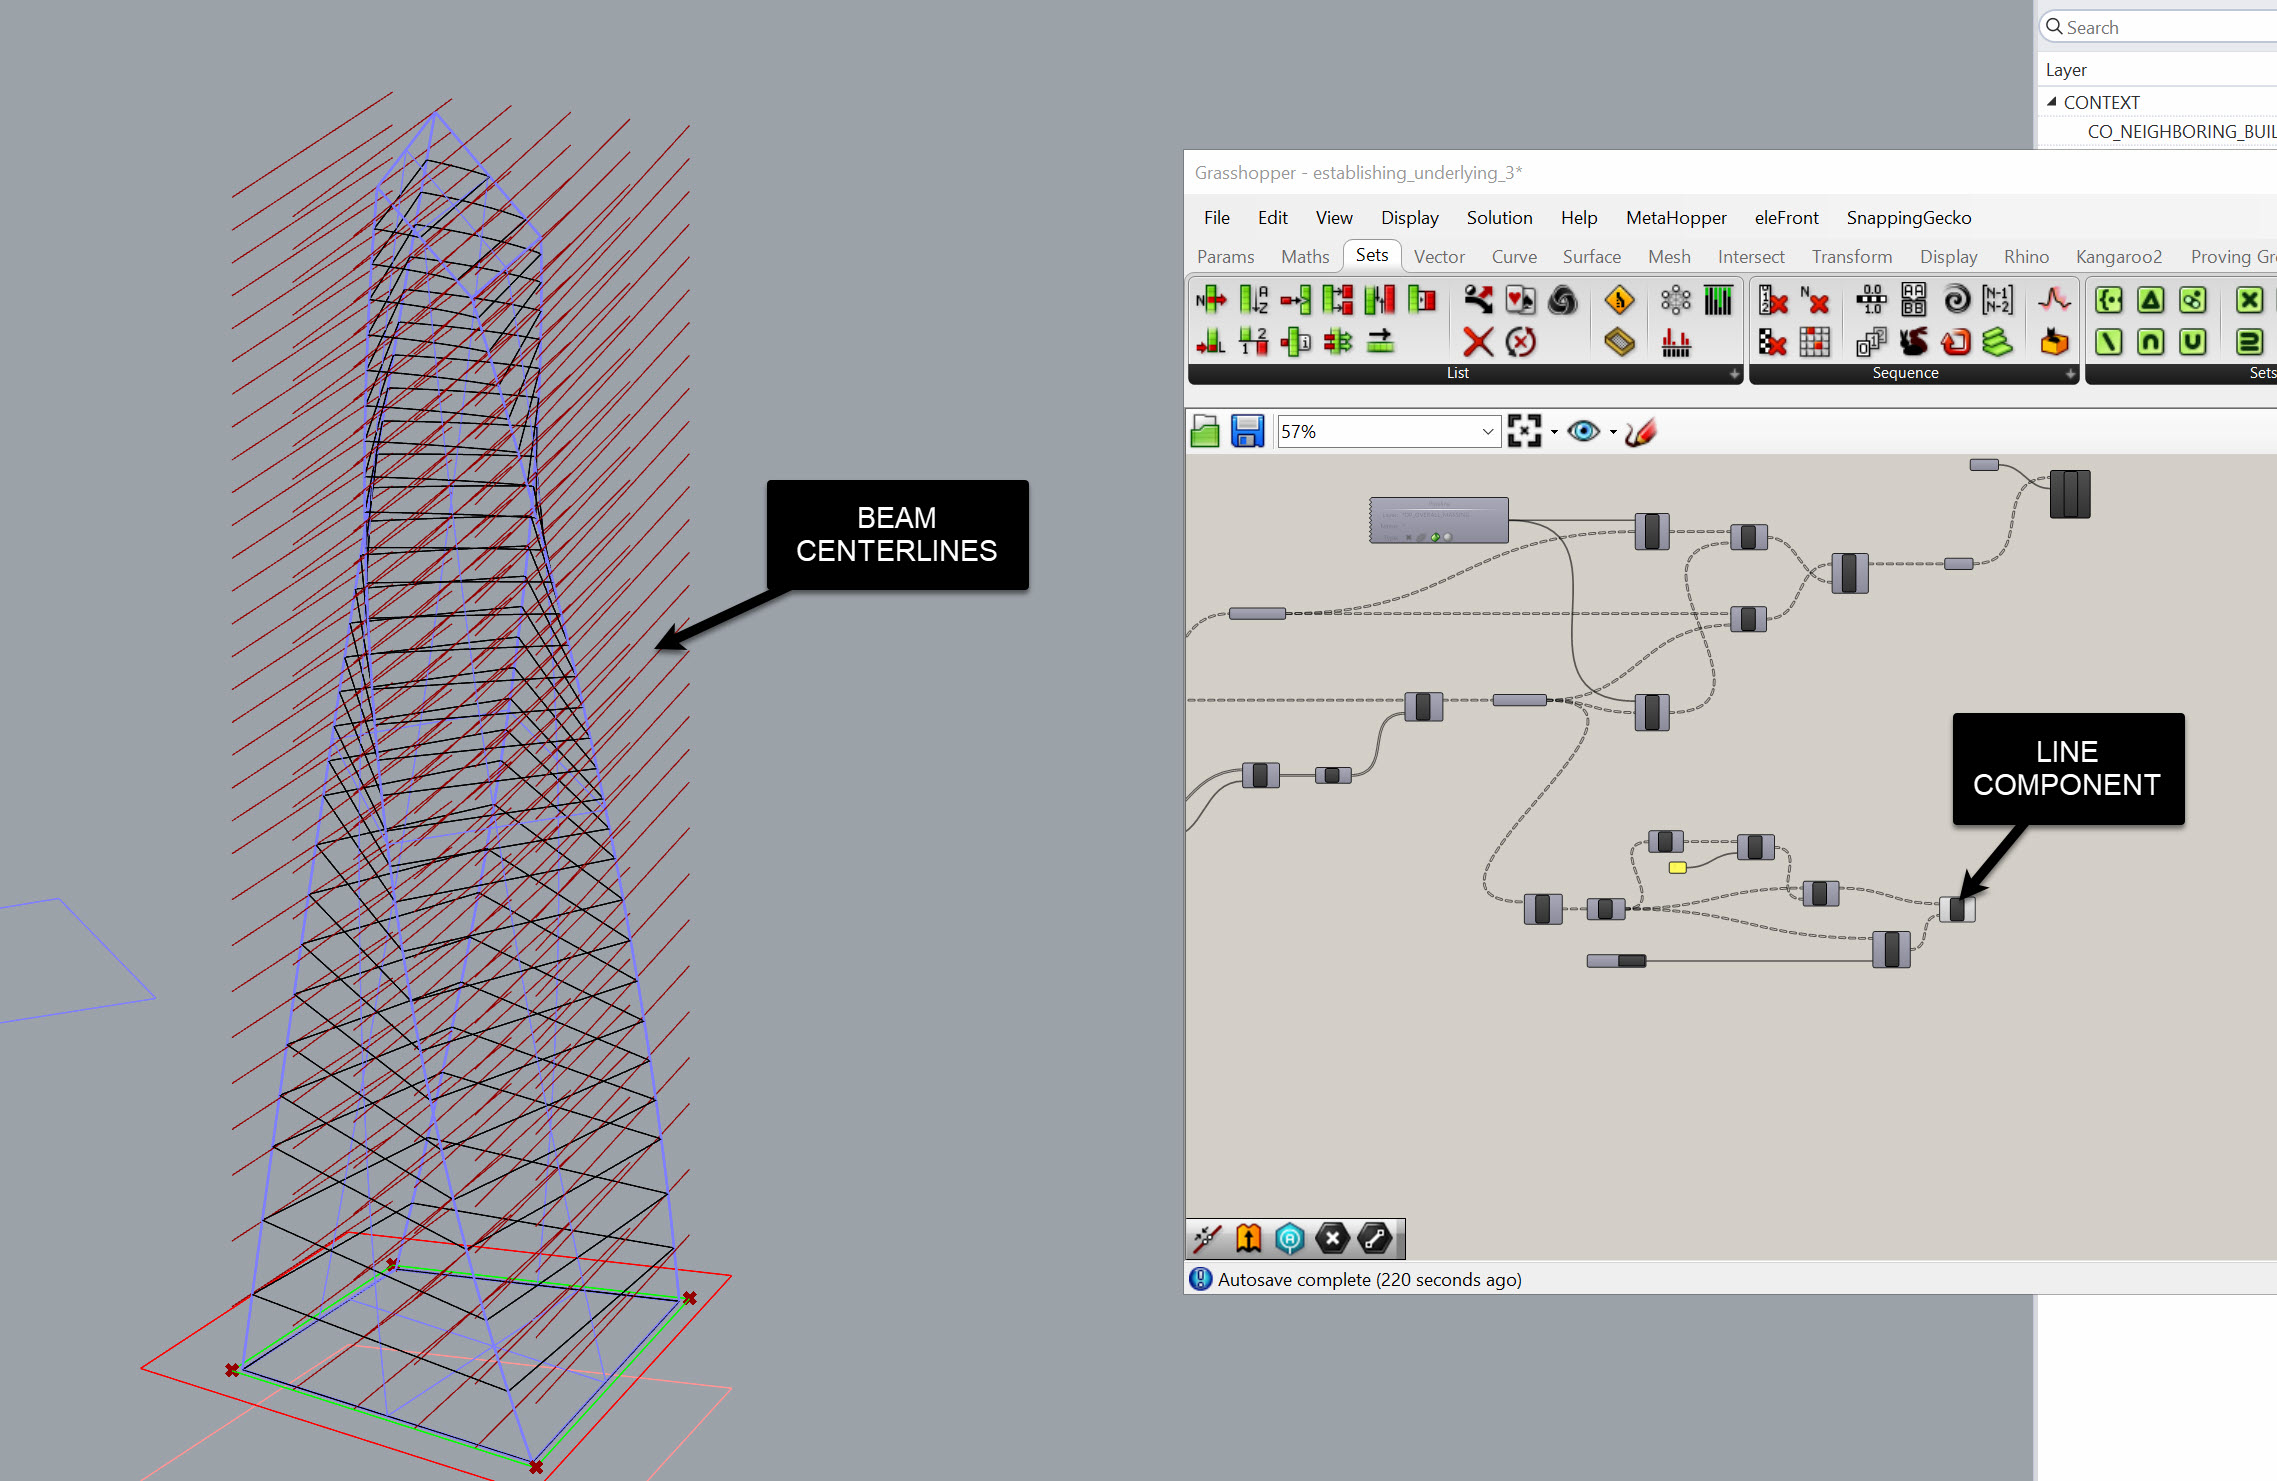
Generating Beam Centerlines from Column Top Points
Now that we’ve got our columns in place, we’ll use the column top points to generate beam centerlines, clean and cull those beams to the building massing, and then push Structural Framing into Revit with the correct Z Offset so beams sit cleanly below the slab.
What you’ll make by the end:
- Beam centerline curves derived from column top points
- A tidy, predictable data-tree structure (per grid direction)
- A culling workflow that keeps only beams fully inside the massing
- Revit beams placed with correct type and vertical offset
Build a beam run per grid direction
We’ll start from the column top points created in the previous module.
-
Flatten one level of hierarchy
Use Shift Paths (PShift) on the column top points to remove the floor level from the paths so points are grouped by grid line instead of(grid × floor). -
Flip Matrix to regroup
Use Flip Matrix to “transpose” your data (think Excel rows ↔ columns).- Before: grouped by vertical grid line (with many floors)
- After: you’ll get lists that are easier to connect across the span in a single direction (e.g., vertical lines → connect along the horizontal).
-
Create adjacent pairs
We want to connect points 1→2, 2→3, … across each grid line list.- Get List Length, subtract 1, and use that value to Split List → output A gives items
1..(n-1) - Take the original list and Shift List by
-1with Wrap = False → output gives items2..n - Use Line (start = A, end = shifted list) to create the beam centerlines.

- Get List Length, subtract 1, and use that value to Split List → output A gives items
Joe’s Tip
PShift is your “remove one folder from the path” tool. Use it to collapse an extra tree level (like floors) when you only need grouping by grid.
Joe’s Tip
Flip Matrix is just a transpose. If your logic calls for “the other grouping,” try flipping first before you rebuild anything.
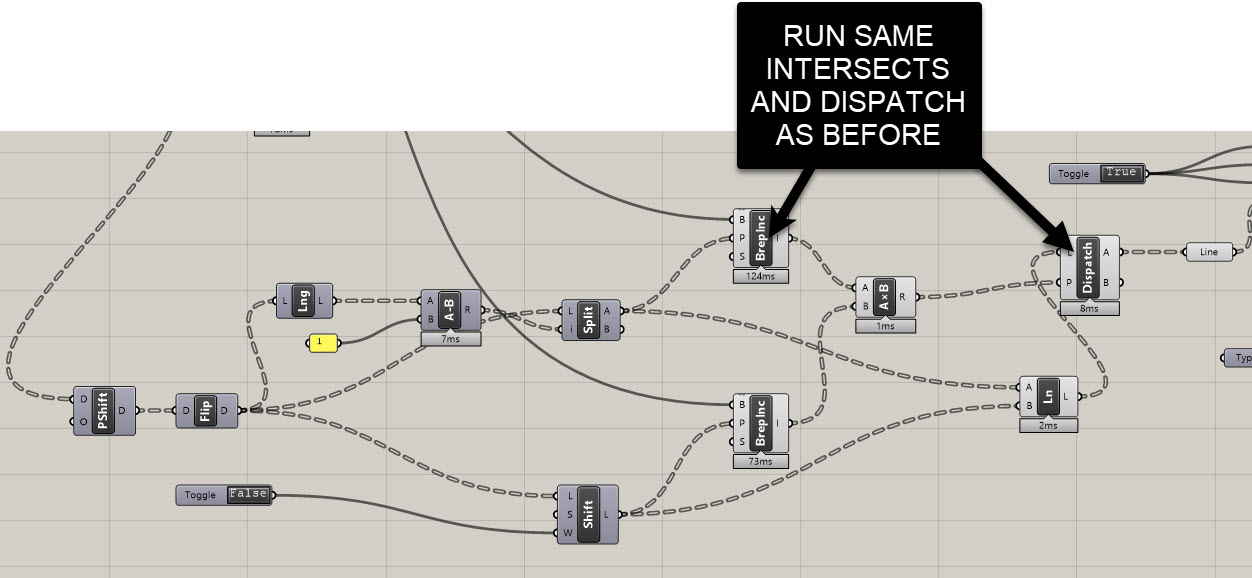
Cull beams to the massing
Just like with columns, keep only beams whose both endpoints lie within the building mass.
-
Bring in massing (Brep)
Use Geometry Pipeline to reference your overall massing layer. -
Point-in-Brep tests
Run Point In Brep on each beam’s start and end points (the two lists from your split/shift workflow). -
Keep only fully-inside beams
- Combine the two boolean lists BY multipling as 1/0
- Use Dispatch on the beam lines with that pattern → the “kept/true” set are your valid beams.
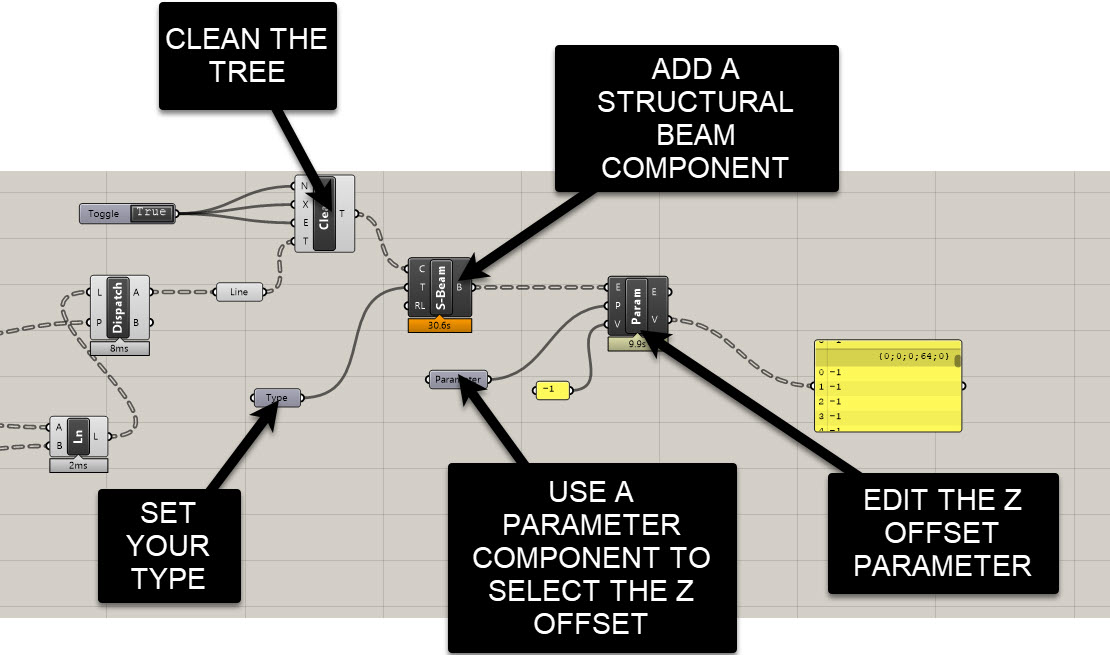
Place Revit Structural Framing
When you’re ready to generate native beams:
-
Type selection
Add a Type node → right-click → choose a Structural Framing type (e.g., Concrete Rectangular 12x24).
If you need to load families, do it in Revit first (Insert → Load Autodesk Family → Structural Framing → Concrete → Rectangular).
-
Add Structural Beam
Use Rhino.Inside.Revit → Elements → Structural → Add Beam (sometimes labeled Add Structural Beam).- Curve = your culled beam centerlines
- Type = from the Type node
- Right click on the node. In the component options, set Tracking Mode = Enabled Replace so it updates cleanly on re-runs. You may need to set this for your columns as well
-
Set Z Offset so beams clear the slab
Revit places beams by centerline, so you’ll often need a negative Z Offset to drop them under the slab soffit.- Use Element Parameter (get/set) for your placed beams
- Parameter = “Z Offset Value”
- For a 12" deep beam: set Z Offset = -0.5'
- For a 24" deep beam: set Z Offset = -1'
(Adjust for your units and exact depth.)

Joe’s Tip
The sign convention trips everyone: negative Z Offset lowers the beam. Match the magnitude to half the beam depth if you want the top to align to the level.
Housekeeping & performance
- Clean Tree before parameter writes to avoid empty branches.
- Keep the massing simple (single closed Brep) for faster Point In Brep.
- If the wrong beams are forming, check your Split List and Shift List (Wrap=False)—off-by-one errors usually live there.
- Verify units:
0.5feet = 6 inches.
Side Challenge
So far we built runs in one grid direction.
Build the other direction using the same approach: PShift → Flip Matrix (as needed) → Split/Shift to make adjacent pairs → Lines → Point-In-Brep cull → Add Structural Beam → Z Offset. Hint: You may need to shift your path in another direction.
Extra credit: assign different Revit Types per direction.
Summary
You now have:
- Beam centerlines constructed by adjacent-pairing column top points
- A consistent, readable tree strategy using PShift and Flip Matrix
- A robust culling workflow against the massing
- Native Revit beams with correct types and Z Offsets for clean slab relationships
This sets you up for framing in both directions and prepares the graph for program-aware variations and connection details in later steps.
