Establishing Levels & Clean Slabs
Up to this point, we’ve:
- Built attributed slab boundaries with program and height data
- Baked them cleanly into Rhino for downstream use
- Set up a workflow where geometry itself carries structured information
Now we’re ready to establish levels and slabs in Revit. This step is critical: it translates our attributed 2D boundaries into 3D Revit elements that will serve as the backbone of the building. Done correctly, this creates a robust and parametric link between your Rhino massing logic and your BIM model.
Why Start Fresh?
In the last section, we emphasized breaking definitions into functions. Rather than building on top of the large attribute script, we’ll:
- Open a new Grasshopper definition
- Reference the baked slab curves with attributes already attached
- Use those attributes to drive levels and slabs in Revit
This keeps our scripts lean and avoids carrying unnecessary complexity forward.
Step 1: Bring in Baked Slabs
- Drop a
Geometry Pipelinecomponent.- Layer =
BAKED_SLABS - Geometry Type = Curves
- Layer =
- Add an Elefront
Get All Keys/Values (getKV)component.- Connect the pipeline output.
- Verify the outputs:
- Keys =
Program,Height,Bake_Name - Values = e.g.
Retail,20 ft, etc.
- Keys =
At this point, you have geometry + attributes reconnected in a clean new definition.

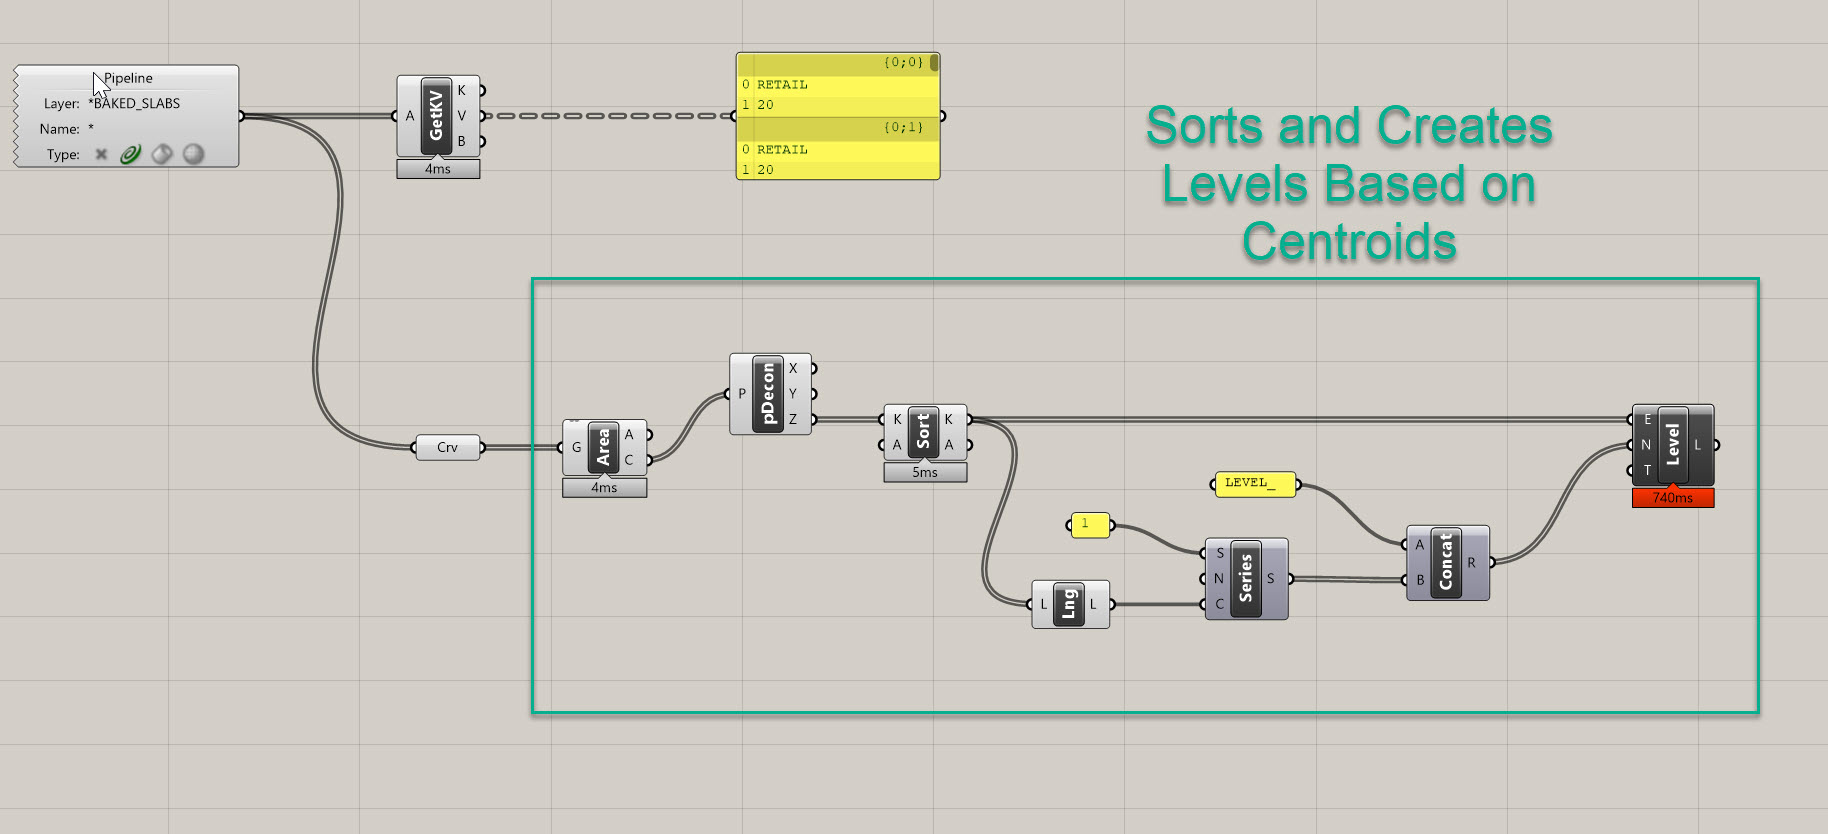
Step 2: Extract Elevations
To establish levels, we need the Z-heights of each floor.
- Connect curves →
Area→ take Centroid (C). Deconstruct Point→ extract Z values.- Use
Sort Listwith Z as the key.- This guarantees levels are created in order from bottom to top.
- Also sort the slab curves with the same keys, so everything stays aligned.
Step 3: Create Levels in Revit
-
Get the number of slabs with
List Length. -
Create a
Series:- Start = 1 (so we get Level_1 instead of Level_0)
- Step = 1
- Count = number of slabs
-
Use
Concatenateto build names like: LEVEL_1, LEVEL_2, LEVEL_3 -
Add a
Revit → Add Levelcomponent:
- Elevation = sorted Z values
- Name = concatenated strings
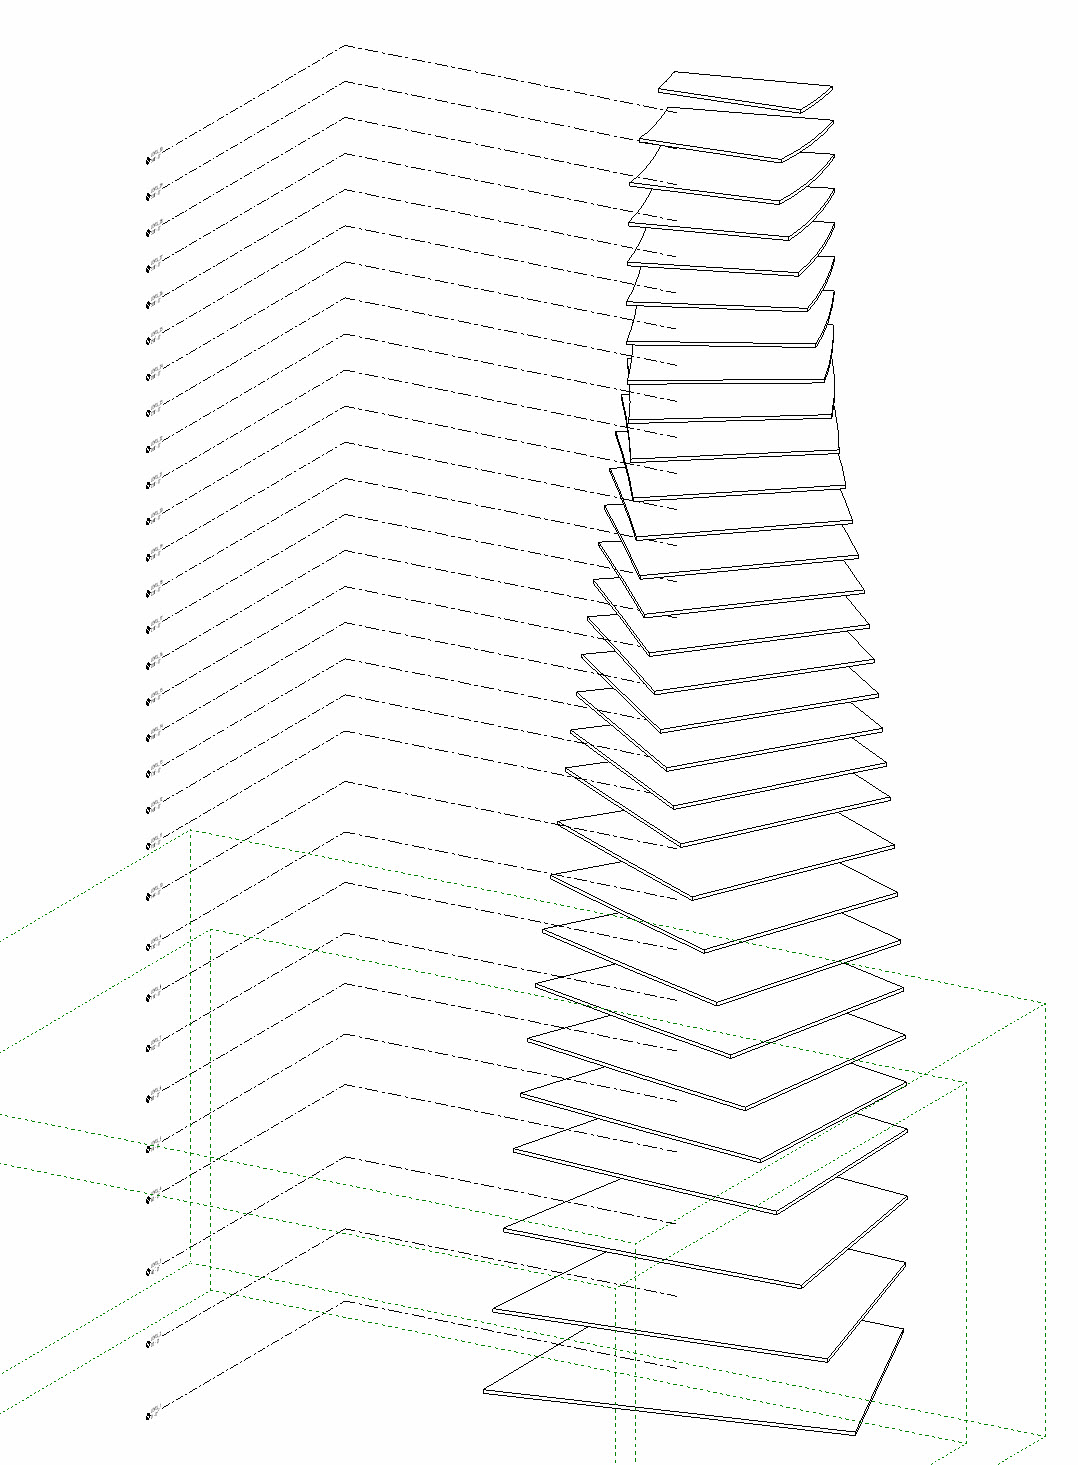
Check Revit → You should see a clean stack of levels. Delete any default L1/L2 levels from your template (Revit will warn about deleted views; we’ll recreate them later).
Step 4: Create Clean Slabs
- Ensure slab boundary curves are sorted with the same keys as levels.
- (Optional but recommended) Guardrail for planarity:
Area→ centroid →XY PlaneProject to Plane→ flatten curves
- Use
Revit → Add Floor:
- Boundary = projected curves (grafted)
- Level = corresponding level (grafted)
- Type = select from
Typefilter (e.g. “6" Concrete”)
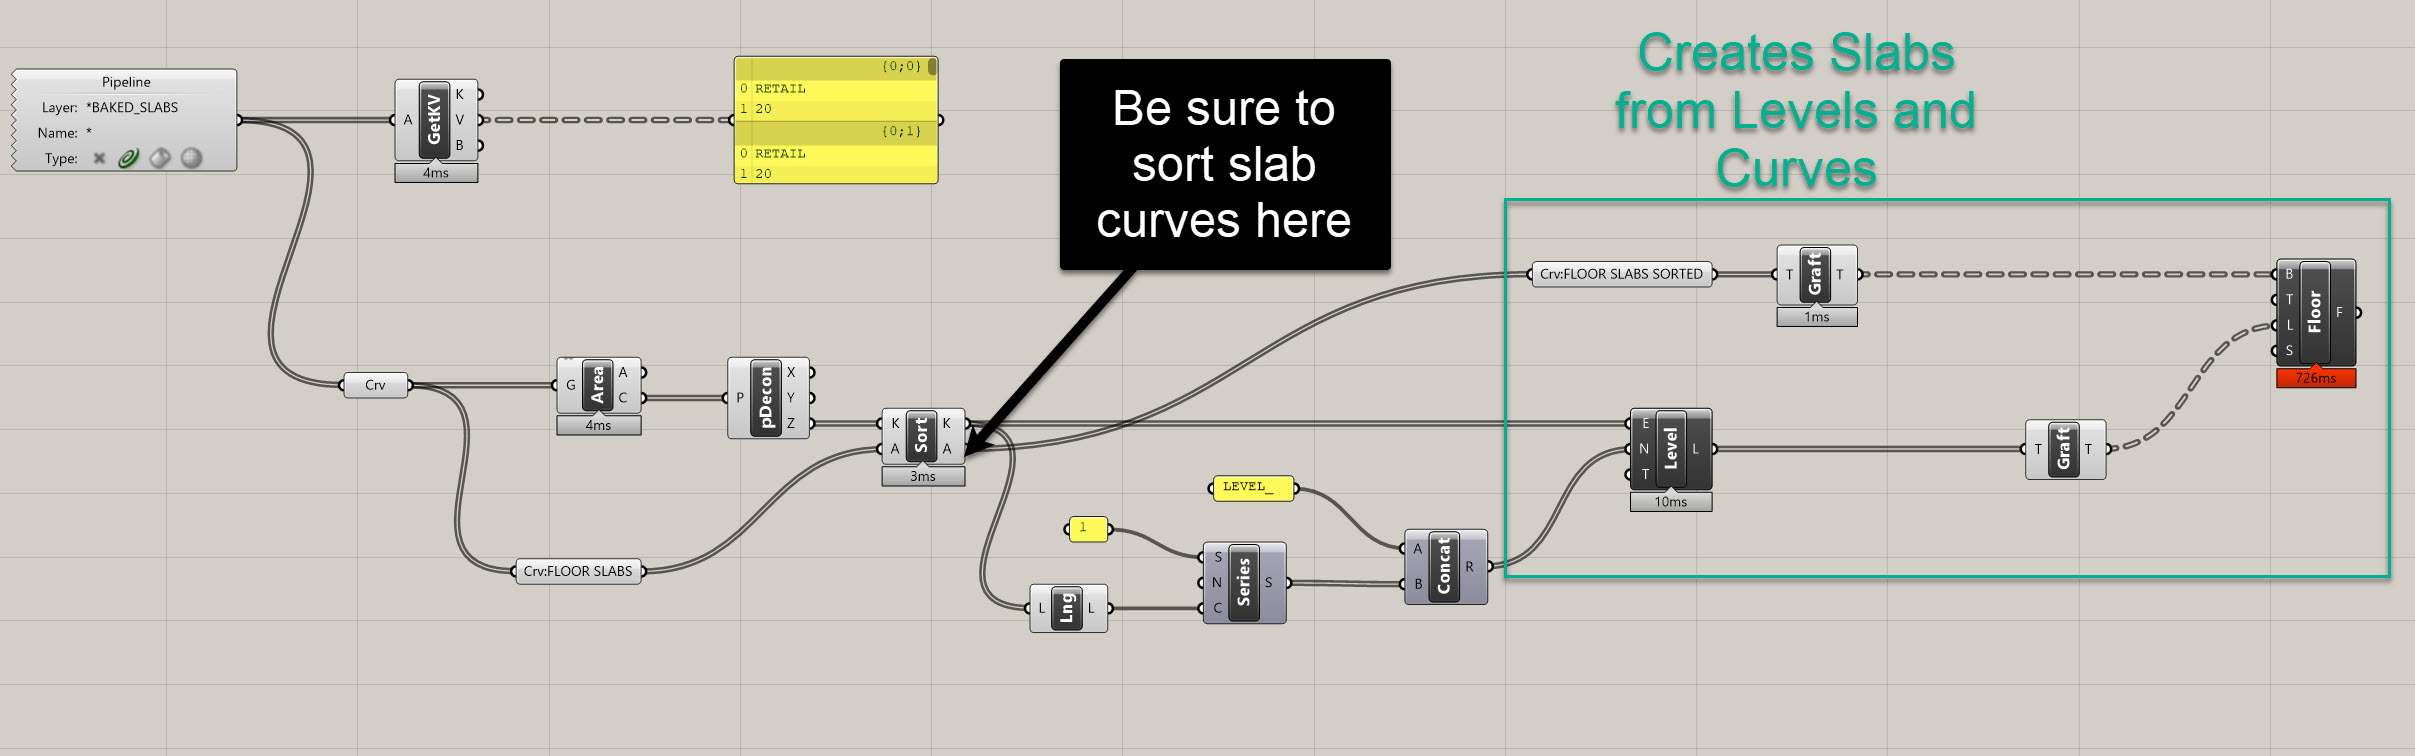
Check Revit: floors should place cleanly at each level.
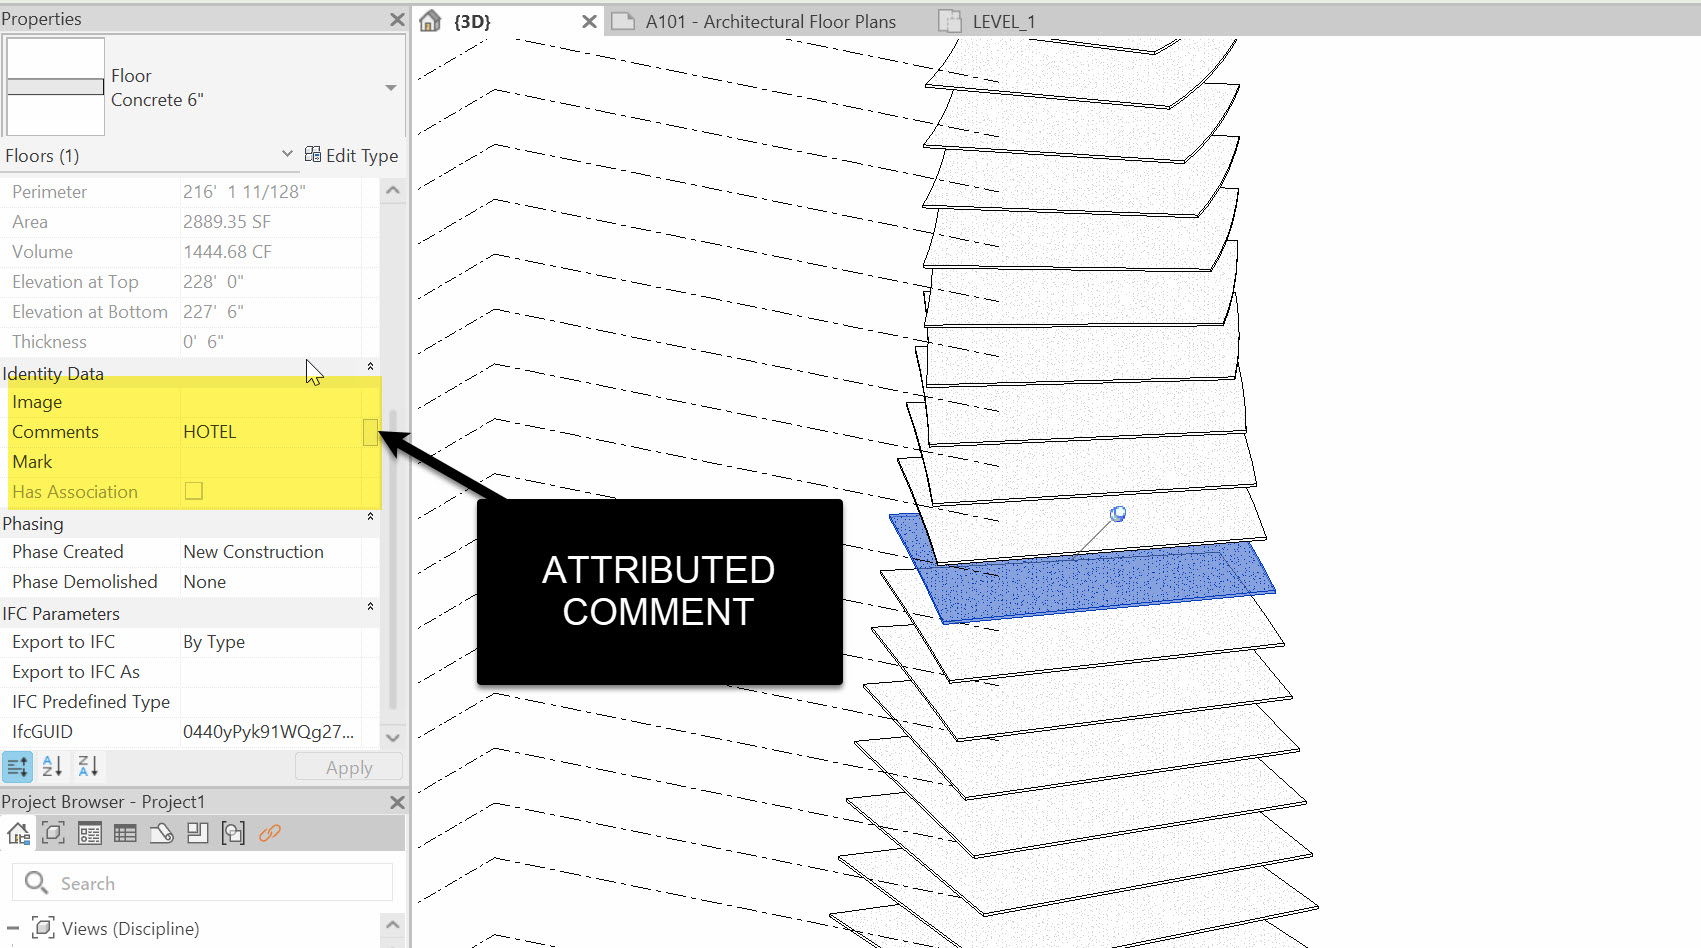
Step 5: Write Program into Revit
- From
getKVValues, extract Program with aList Item. - Sort the program list with the same Z key used for slabs.
- Graft the list to match floor branches.
- Use
Revit → Parameterfiltered to Floors, select Comments. - Use
Element Parameter:
- Elements = Floors
- Parameter = Comments
- Values = Program list
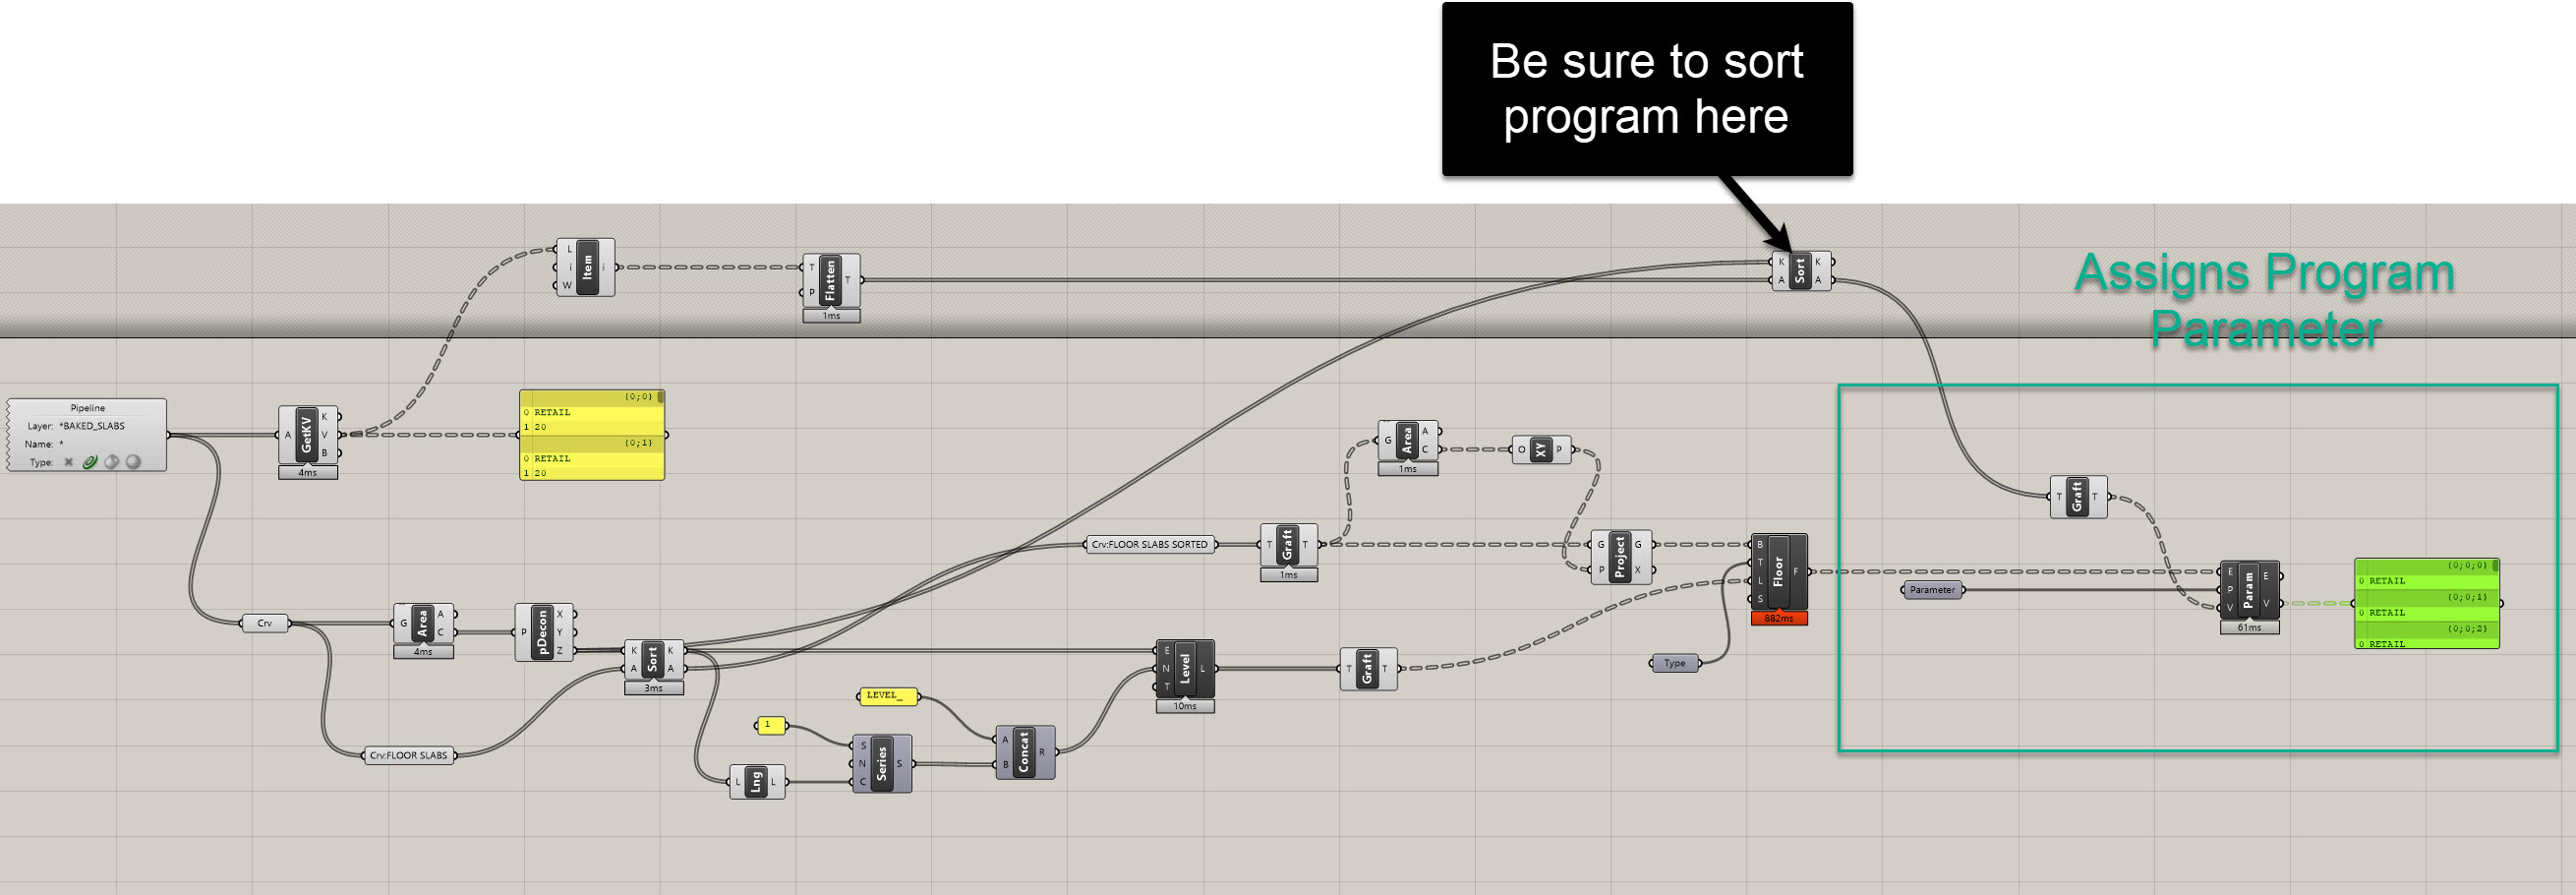
Now each floor in Revit carries its program directly in the Comments field.
Step 6: Recreate Plan Views
Since we deleted template levels, create new floor plans:
- In Revit: View → Plan Views → Floor Plan
- Select all new levels
- Click OK
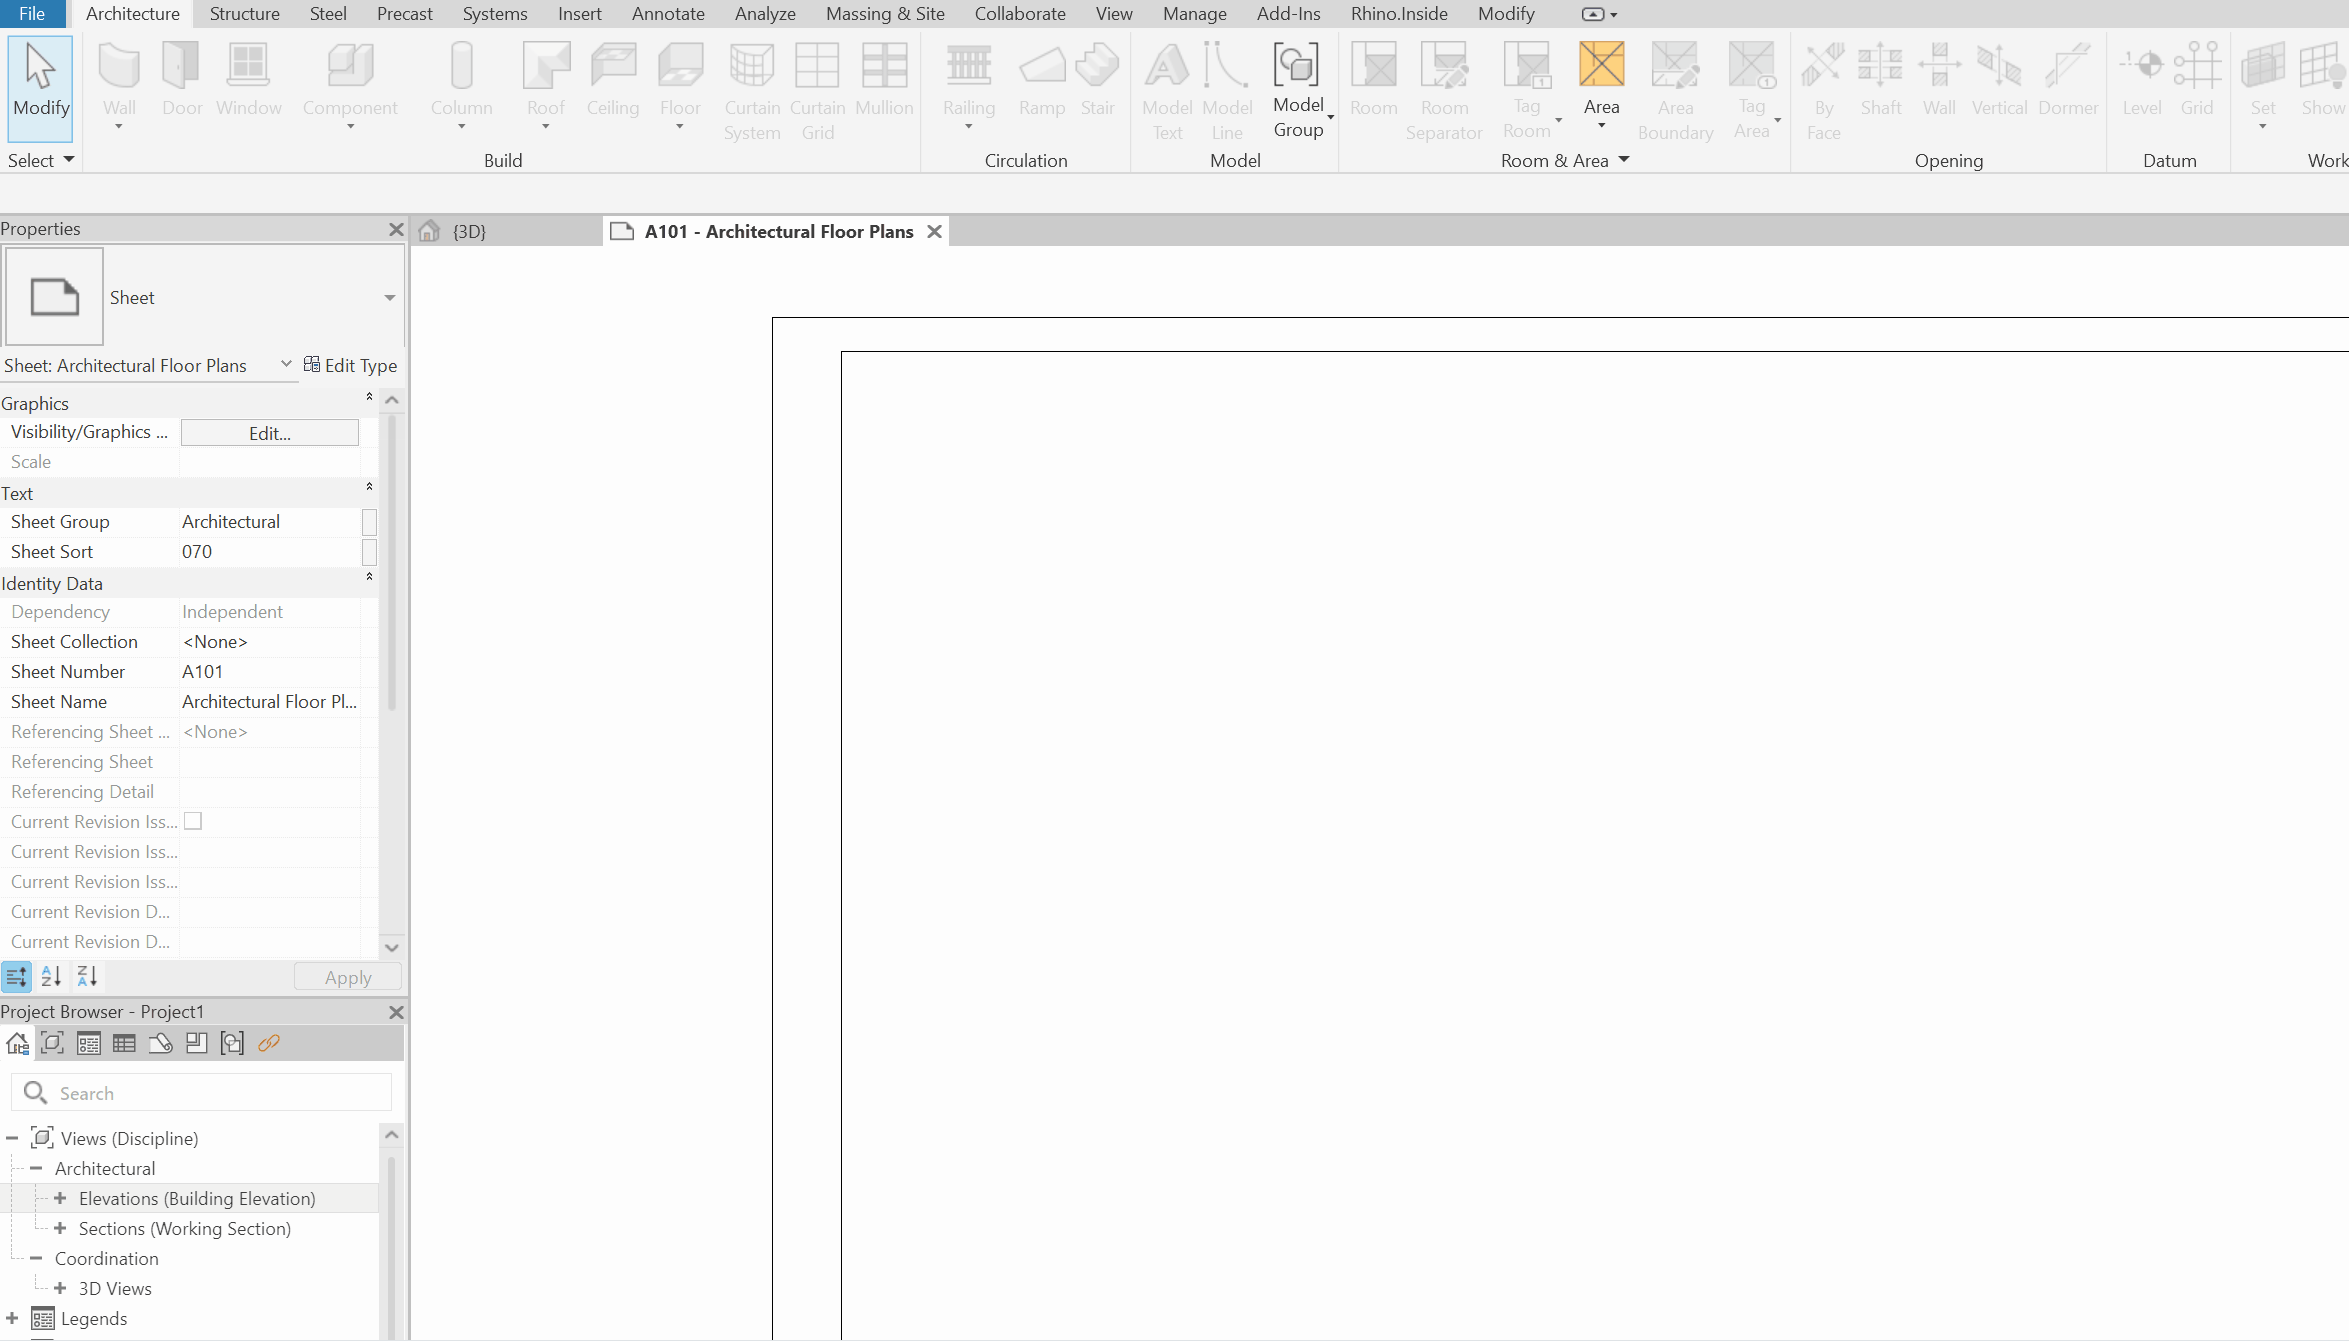
You now have fresh views for each level.
Side Challenge 9
Try extending this workflow with two refinements:
- Zero-Padded Level Names – format series numbers so they read
LEVEL_01, LEVEL_02, …. - Auto Roof Level – detect the top Z, add a “ROOF” level at
Top + Offset.
Summary
In this section, we:
- Referenced baked slabs with attributes in a new definition
- Extracted elevations and created ordered Revit levels
- Built clean Revit floors, ensuring planarity and alignment
- Wrote Program into each slab’s Revit Comments field
- Recreated floor plans for all levels
At this stage, you’ve established a coherent skeleton for your building in Revit: levels, slabs, and associated metadata. This is the foundation for structural systems, façade systems, and compliance checks in later modules.
On to the next tutorial!
